
Photoshop: criar setas
No Photoshop, você mesmo pode criar setas ou usar as formas pré-fabricadas. Esta dica prática mostra como encontrá-los e inseri-los.
Crie setas no Photoshop - com a "Line Drawing Tool"
- Selecione a "Ferramenta de desenho de linha" na paleta de ferramentas. Isso pode ser encontrado no menu abaixo da ferramenta de texto. Para fazer isso, pressione o botão até que um menu suspenso seja aberto. Em seguida, selecione a ferramenta apropriada.
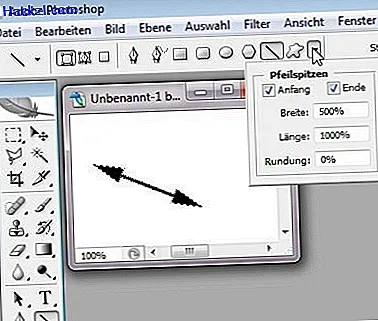
- As opções da ferramenta agora são exibidas na barra de tarefas. Abra as "opções de geometria" lá. Para fazer isso, clique no pequeno triângulo à direita da seleção da forma.
- Agora verifique o "Start" e / ou "End" - dependendo de onde você deseja anexar a ponta da seta.
- Você pode regular a forma e o tamanho das pontas das setas usando as porcentagens de "Largura", "Comprimento" e "Arredondamento".
- Em seguida, desenhe uma linha no seu documento. Agora você receberá uma seta de acordo com os parâmetros definidos anteriormente. Claro, você ainda pode ajustá-los.
Crie setas no Photoshop - com a "ferramenta de forma personalizada"
- Selecione a "Ferramenta Forma própria" na paleta de ferramentas. Isso pode ser encontrado no menu abaixo da ferramenta de texto. Para fazer isso, pressione o botão até o menu suspenso abrir. Em seguida, selecione a ferramenta apropriada.
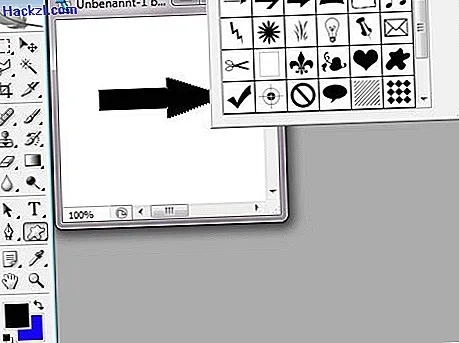
- Na barra abaixo da barra de tarefas, agora você pode ver as opções da ferramenta. Selecione a forma da seta desejada no menu "Forma".
- Use o mouse para desenhar um retângulo do tamanho desejado. Uma seta é criada na forma e no tamanho que você escolheu.
No próximo artigo, leia como retocar manchas no Photoshop.